Wondering how to edit your profile on Homes.com? It’s easy! Just follow these simple steps.
First, make sure you are signed in to Homes.com. If you are signed in and you’ve uploaded a photo, you should see your photo in the top right corner. If you haven’t added a photo to your profile, you’ll see your initials.
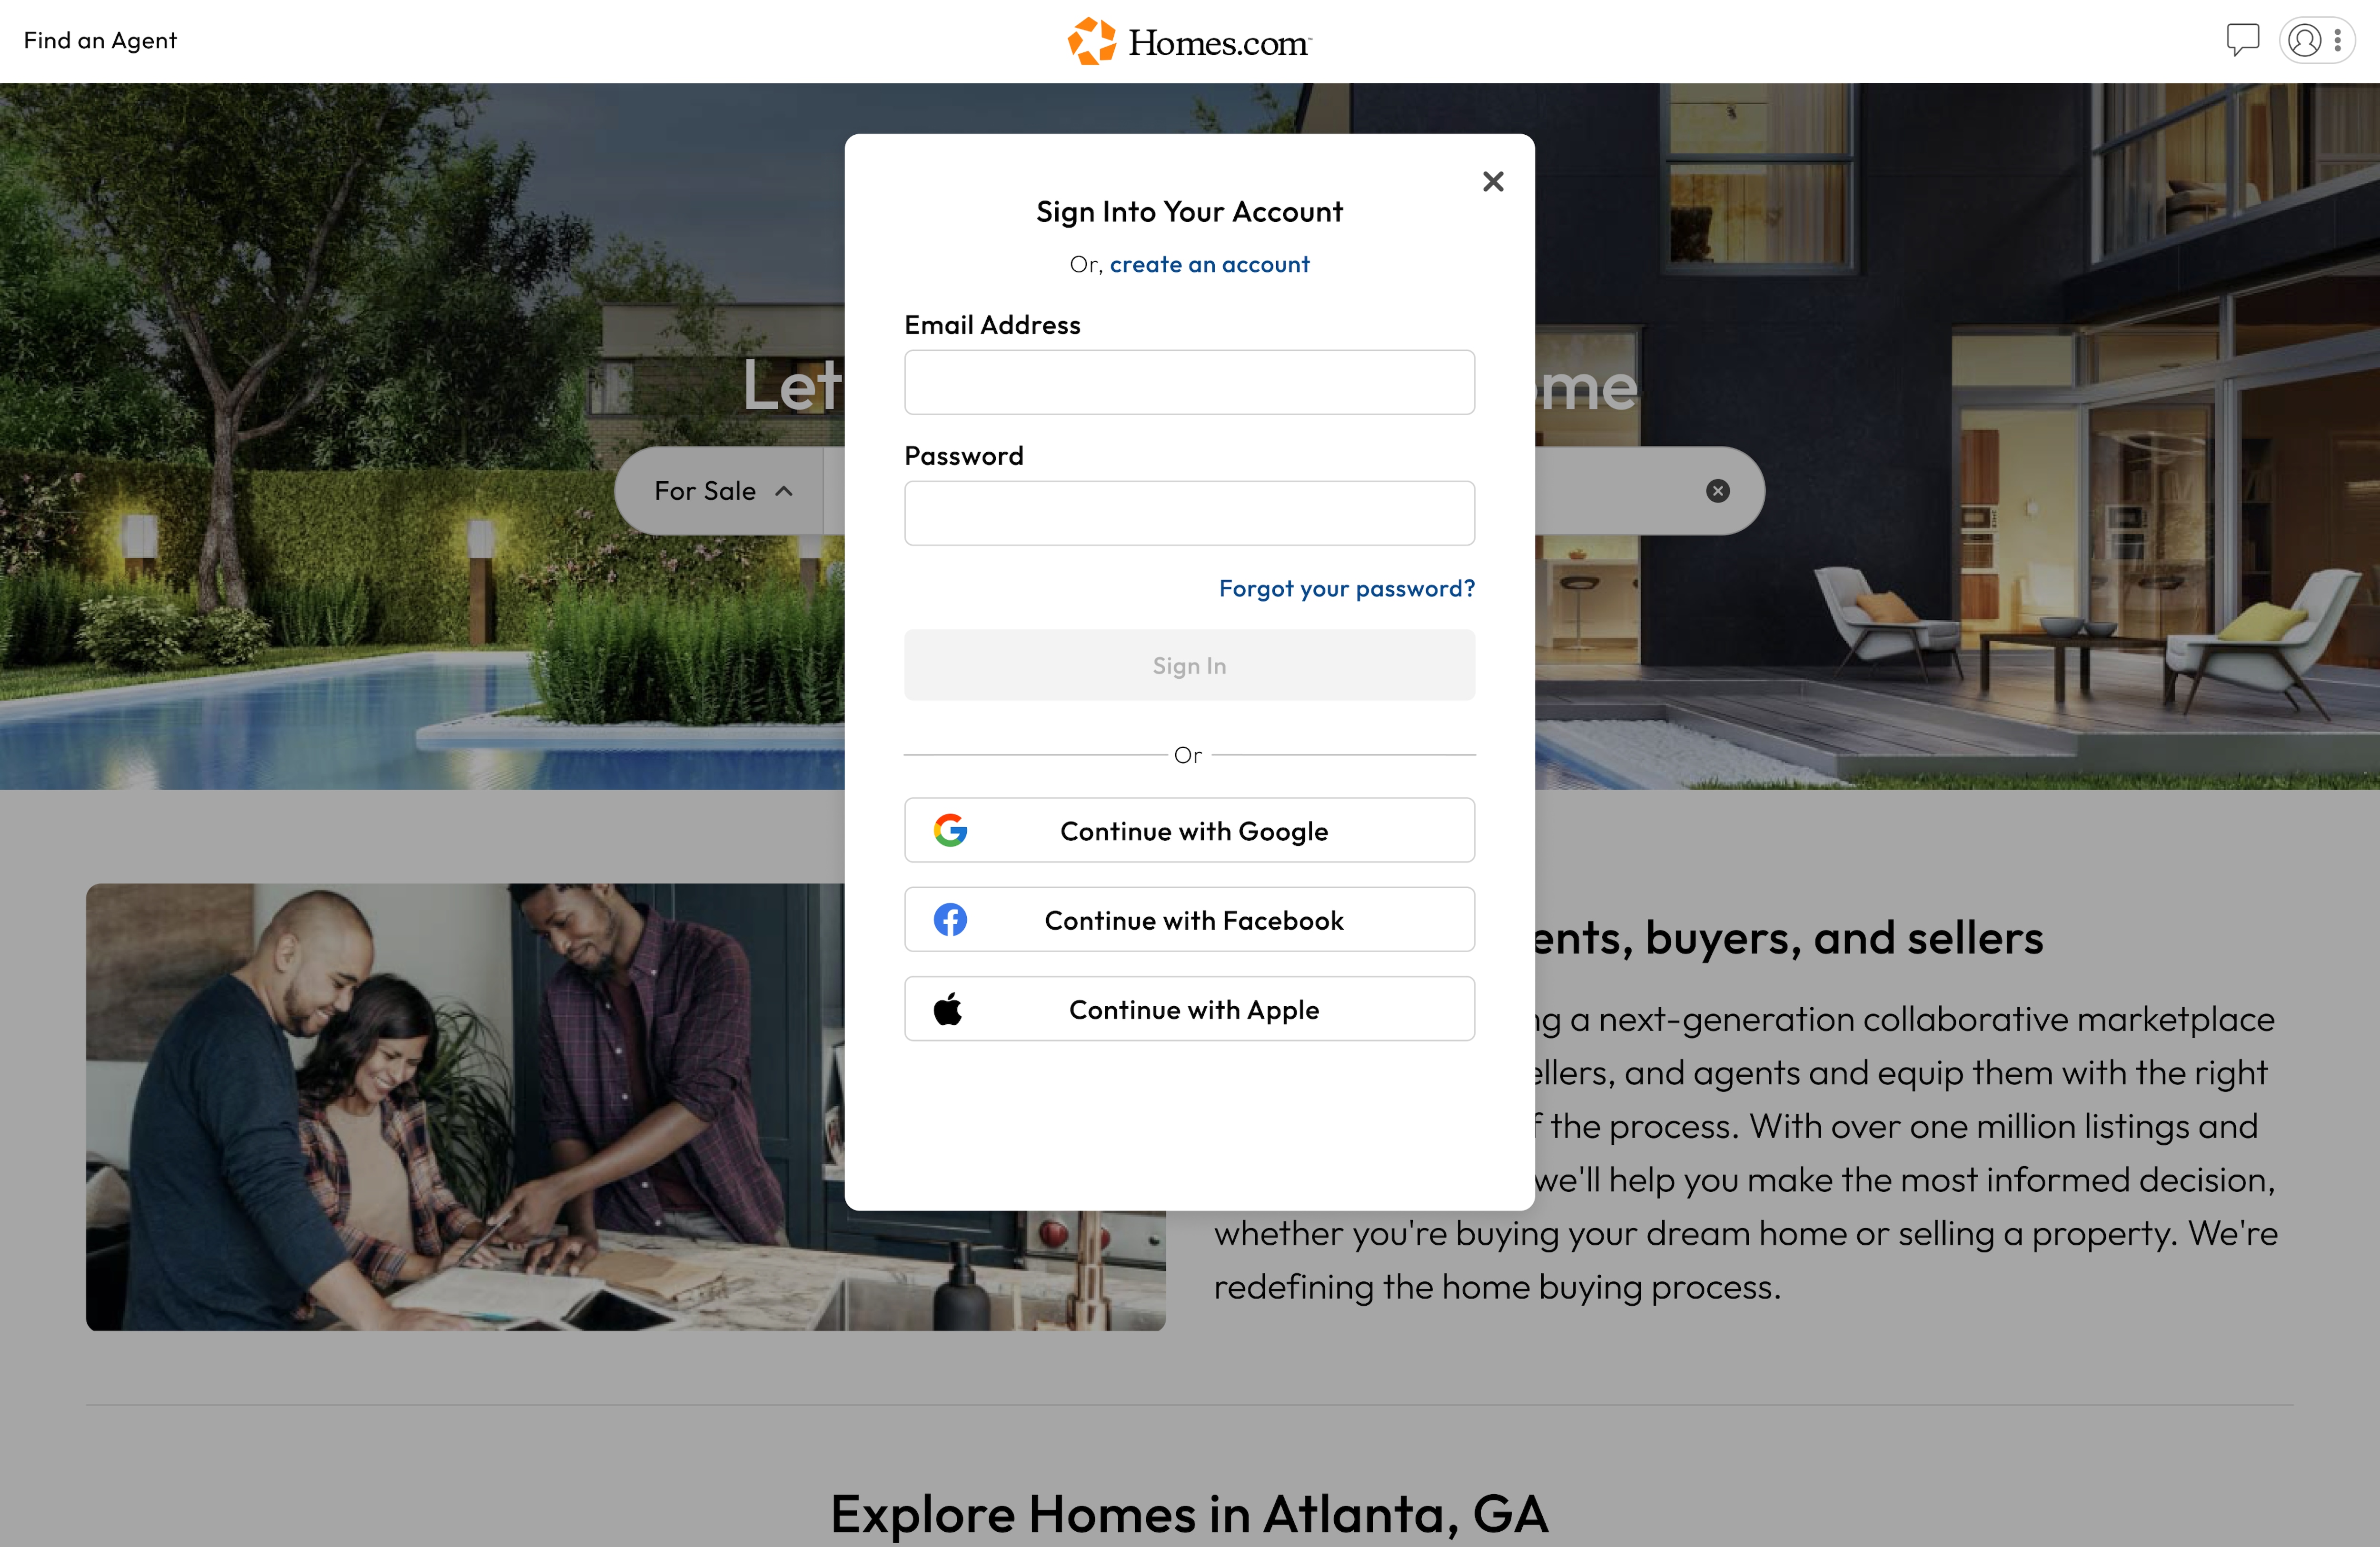
If you aren’t signed in, you’ll see a blank outline where your photo or initials should be. Click on it and select “Sign Up/Sign In.” Enter your email address and password, then click on the orange “sign in” button. Alternatively, you can choose to sign in with Google, Facebook, or Apple.
If you haven’t signed up yet, follow these instructions to create your account.
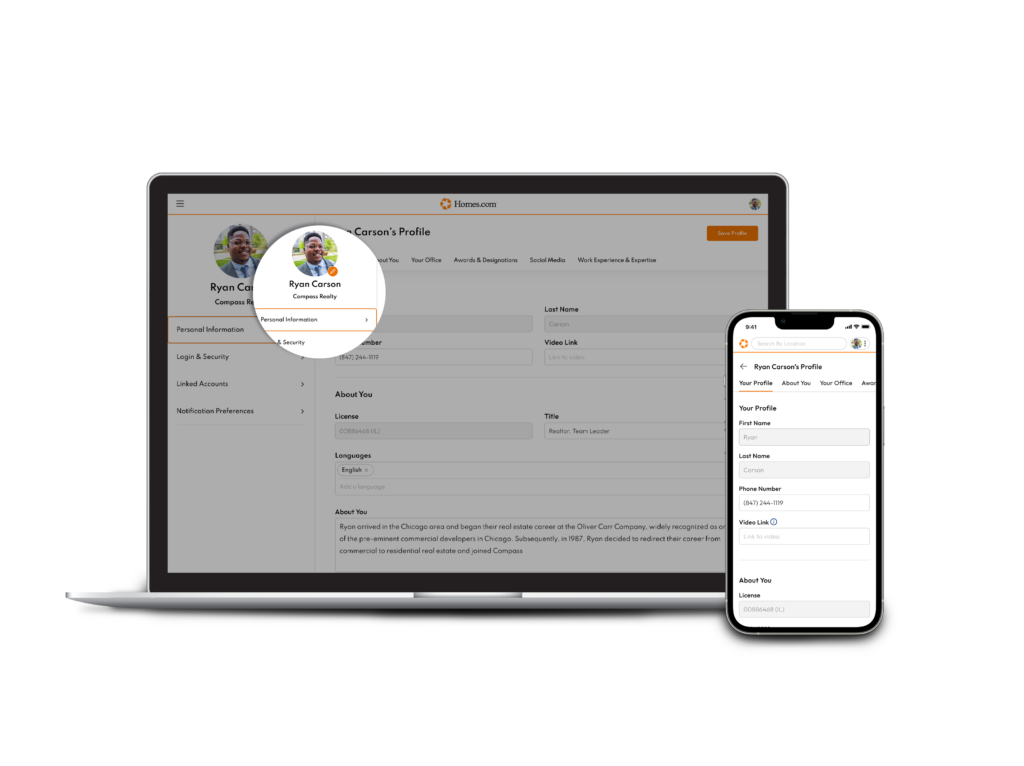
Now that you’re signed in, click on your small, round photo in the top right corner and choose “Account Settings.”
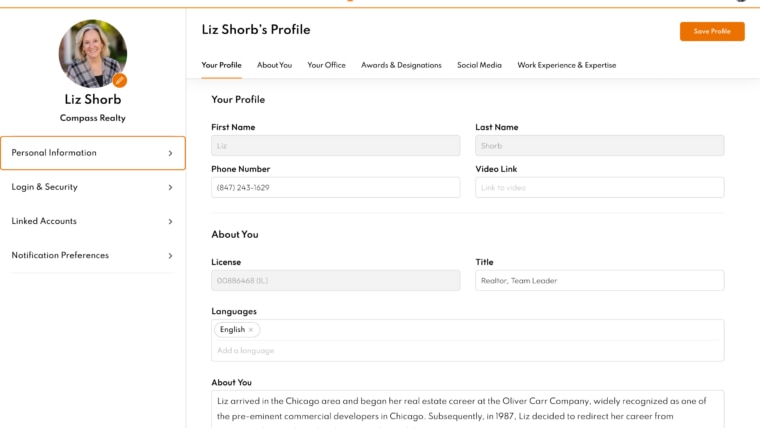
You should see a page with all your information. Under your photo, you’ll see three options: Profile, Login & Security, and Notification Preferences. Let’s start with your profile.
Your Profile
This section is where you’ll see your name (first and last), your phone number, and a link to your video if you have one. While you can’t change your name from this section, you can change your phone number and video link. After making changes, click on “Save Profile.”
About You
This section is all about you! While you can’t change your license, you can specify languages and write a bio telling potential clients all about yourself.
Your Office
This specifies where you work and the address. You added this when you signed up and this information can’t be changed with your current account.
Awards & Designations
Here’s where you can show off your accomplishments! Select all that apply.
Social Media
If you’re active on social media and want potential clients to follow you, add your profiles here. The symbols should be recognizable, but just in case, they are as follows (left column, then right column):
Work Experience & Expertise
This final section lets potential clients know where you work and the types of listings you deal with. Add the cities you serve by typing the name of a city in the box, then selecting the city from the dropdown. The city will appear in the box, then you can add another city.
Next, select your specializations. You can turn “on” and “off” as many as you like.
Login & Security
This is where you can change your username and password. Next to “Username” and “Password,” you’ll see a corresponding box that says “Update.” Click on the one for which you want to change. If you want to change your username, you’ll get a pop-up that prompts you to enter a code that was sent to your email address when you clicked on “Update.” If you don’t see the code in your inbox, be sure to check your spam folder. Enter the code and hit “Verify” to change you username.
To change your password, select the “Update” button. In the pop-up, enter your current password and your new password. You’ll also have to confirm your password. After filling out these fields, hit “Change Password.”
Notification Preferences
Getting too many emails? You can control your notification preferences in this section. If you don’t want updates concerning any of these topics, slide the corresponding button to the left to turn that option off. Slide it to the right to turn that notification on. Make sure you click save after making changes.